Zaph|Audio

Slimline Wall-Mounted Speaker - Aura NS3-193 / Dayton ND20TB-4
(Part 1 - cabinet design)
Introduction
This is a speaker system that is designed to be mounted on a wall. There are many possible uses for this type of speaker, first and foremost mounted next to a plasma TV in an HT room. But it's perfect for any usage where you want a small, great sounding system that does not require a set of stands or any floor space. Great for use as rear surround speakers, or on the wall near your desk with a flatscreen LCD computer monitor. Maybe a mounting high on the wall for "architectual audio" without having to cut big holes for an in-wall system. This is Part 1 of this system, documenting the unique cabinet design. I will walk through the construction and add notes for those hoping to reproduce a similar cabinet.

Slit/bent and formed MDF
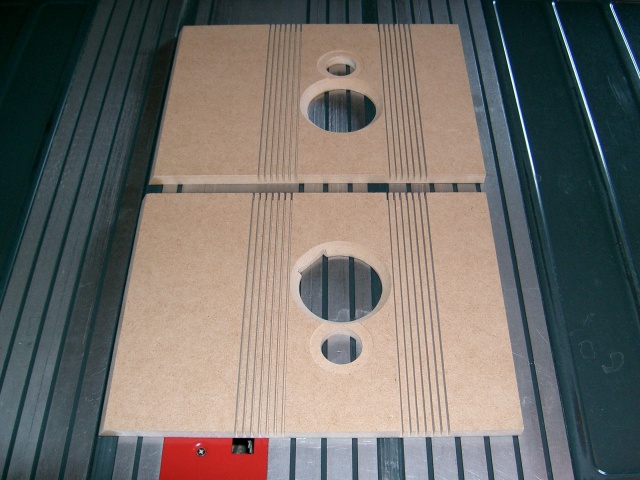
One-piece front and sides
This is the first piece made, and I guarentee that some experimentation will need to be done before you can do a final piece with the driver holes cut. The dimensions shown on the drawing indicated what worked for me, but the number of slits and angle resulting from each slit will vary. If reproducing this design, there will likely be minor differences in the finished dimensions all over the place. I used a 1/16" blade with 1/4" spacing and 7/16" cut depth. Note that a 1/8" blade will be way too thick for this application and the mdf will crack when it is bent. Those in countries with metric tools will have to find an equivalent that works for you.
The rear-mount Dayton tweeter is not exactly 1/2" so I had to put a mild 1/32" countersink on the back. The Aura woofer requires 45 degree chamfers for airflow.
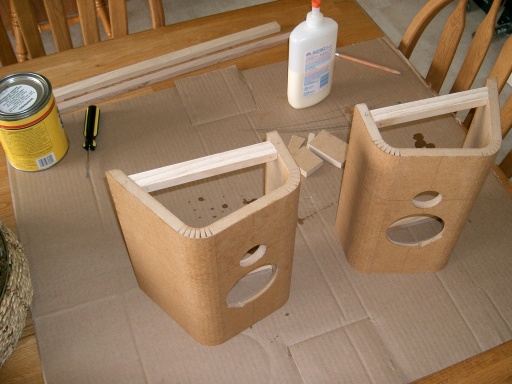
Formed with top and bottom braces
Gluing these into their form is tricky. Before gluing, I recommend getting the outside of the mdf near the slits wet. Not "soaking in water overnight" wet, but basically keep it wet for a couple minutes with a washcloth so the water sinks in a little bit. This prevents cracking the MDF. Then brush plenty of glue into the slits. Some of the glue will rest on the MDF between the slits, so press it in by "brushing" with a flat piece of cardboard if required.
Two 12" clamps will be needed per speaker. Hold the middle down, gently pull the sides up until the slits completely close. Lightly clamp in that position. Don't clamp too tight, or the pressure/tension differential bentween the outside and inside will crack the MDF in the middle. Note that you can insure that the cabinet is formed straight by measuring at the top and the bottom and adjusting the clamps a little bit so they are the same dimension. A little glue will gush out of the slits. Smooth it over with your finger but don't remove all of it since the extra surface coating of glue adds strength.
After it dries, the top and bottom gussets can be glued into place. All 4 of your gussets will be the same length, so this is another chance to straighten out the enclosure. These gussets also serve as a stop for the removable back panel, so be sure their spacing is exactly 1/2 from the back when it is laid flat.
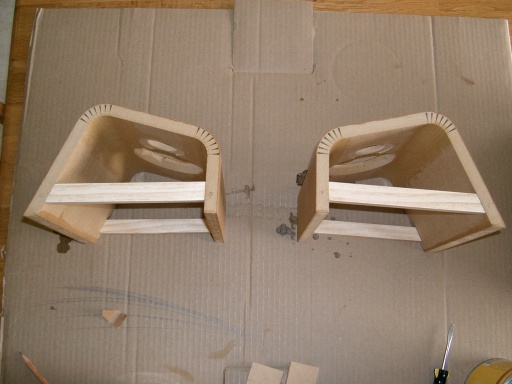
End view
I do not provide detailed dimensions and angles for any of the gussets. These are parts that will be different for everyone since not everyone will get the same forming angles. You can lay your 1/2" x 3/4" piece of wood on the top of the formed enclosure and trace the inside edge underneath with a sharp pencil to get a rough idea of the length and angles.
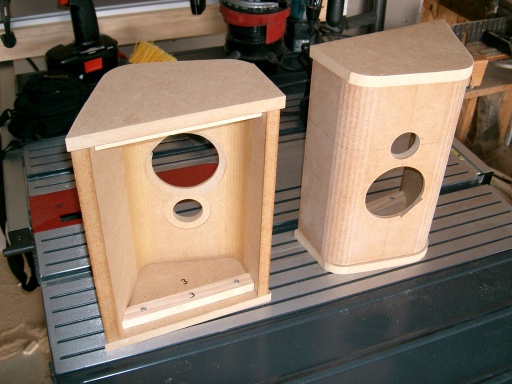
End caps screwed in place
The top and bottom gussets serve as a way to hold the top and bottom plates in place while they are cut and routed. First the rectangular boards are laid on the formed front and sides with the flat back side lined up with the sides of the formed piece. Traced around the outside edge with a pencil. Make your rough cut at least a 1/16" oversize. Then screw them into place with the 2 screws as shown. Then make your first trimming operation with a ball bearing flush bit. Then make your second operation with a ball bearing 1/2" roundover. Number all tops and bottoms so they go back into the same spot later. Take them off for finishing.
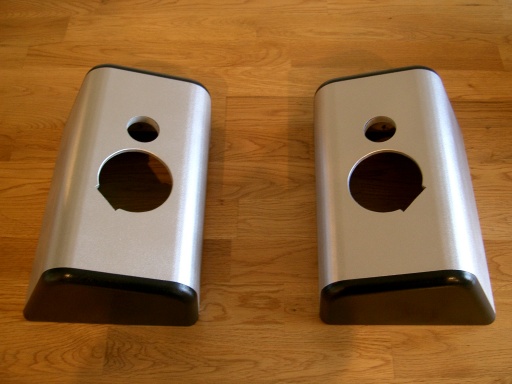
Painted
Paint as you like. This finish will match many monitors. The tops and bottoms are first sanded and edge-sealed, then painted with 2 coats of Rustoleum black texture finish. Finally a single coat of clear gloss over that. The front and sides are also sanded and sealed then painted with black texture finish. Instead of a clear coat with these, I used metalic silver. this gives it a cool "extruded/cast aluminum" look with the black end caps providing good contrast. After the parts are dry, the tops can be glued on. Use very little glue, and place it near the inside edge so it's not likely to gush out. If some does gush out, be quick qith a wet washcloth to clean it up. Place a good fillet of glue on the inside edge for good strength and sealing.
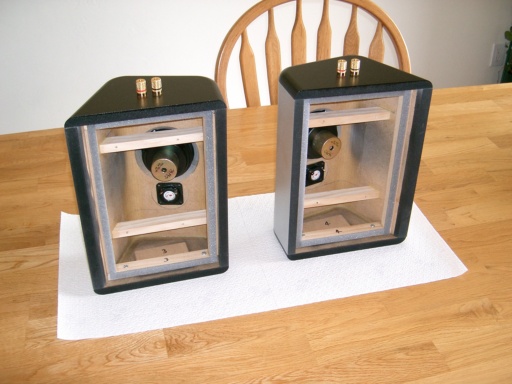
crossmembers, trim strips and gasketing
The two inside crossmembers and the rear panel stops can be glued in as this point, or before the top and bottom is glued into place. I used low density weatherstripping to help seal the rear panel. You'll know it's the right stuff if it can compress down to almost nothing. Use lots of glue and get a good bead all the way around the two inside crossmembers. These will bear the tension of the 4 screws that pull the rear panel into place.
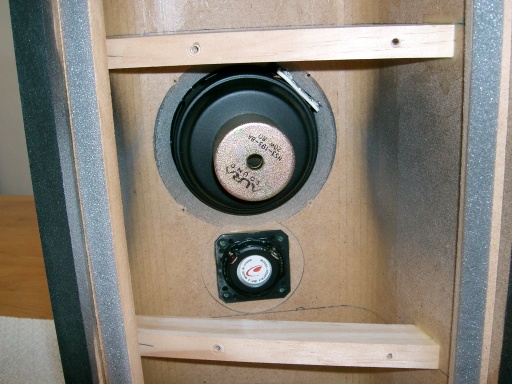
Close-up of crossmembers and drivers
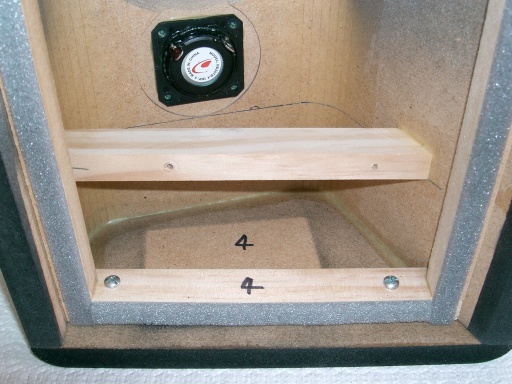
Close-up of top with tweeter

Close-up of bottom and terminals
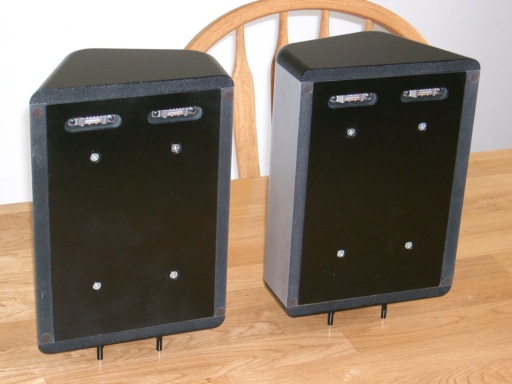
Backs screwed into place
Using 4 screws like this helps even the pressure all the way around the rear panel edge. Tighten the screws only enough to compress the low density gasket. If you tighten them too much, you risk putting too much shear stress on the inside crossmembers. You will want to pre-drill and pre-thread the 4 holes in the crossmembers before putting the rear panel on. Drill the 4 holes in the rear panel a size big enough to allow the threads complete clearance.
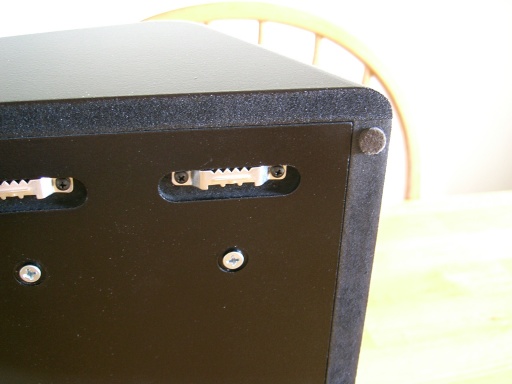
Close-up of Back corner
Picture hanging brackets are used to support the speaker. They can be countersunk to help get the speaker closer to the wall. Small felt pads will help limit vibration transmition between the speaker and the wall.
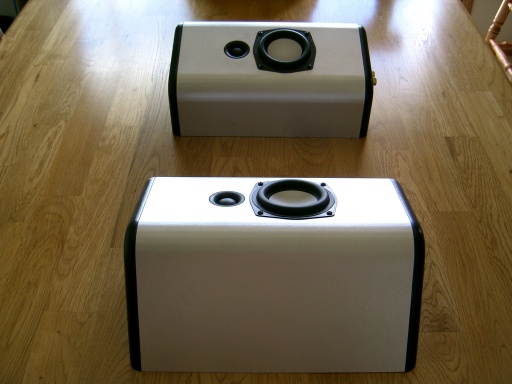
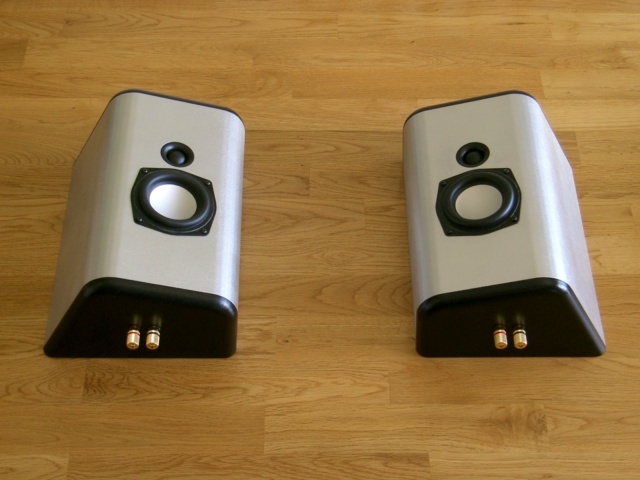
Finished side view
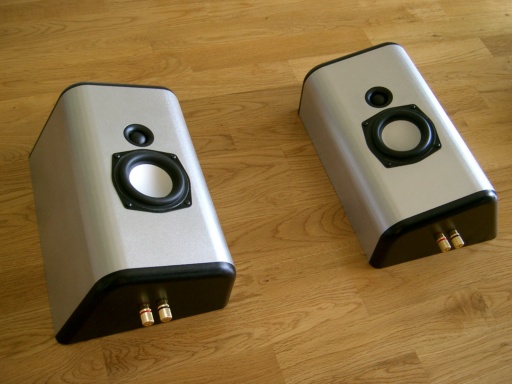
Finished isometric view
I expect to have these mounted on the wall in my office someday next to my flatscreen computer monitor, which also shares a silver and black color format. It should look pretty cool.
For the crossover design, please see Part 2.
Enjoy!
Page done by John "Zaph" Krutke © 2005
Also visit -Zaph|Audio-